
Pop-Tarts have been a favorite breakfast treat for decades; I unabashedly eat one every morning. Unfortunately, the store-bought versions often contain allergens that can be problematic for Emory. I decided to figure out how to make an allergy-friendly version of my favorite breakfast treat that she can incorporate into her back-to-school routine.
Today, I’ll be sharing a delightful recipe for homemade gluten-free brown sugar Pop-Tarts that will satisfy your cravings without compromising your dietary needs. This scrumptious creation is both gluten and dairy-free, and it’s a fun project for the whole family to enjoy.
GLUTEN-FREE BROWN SUGAR POP-TART INGREDIENTS
For the pastry dough, I used Wholly Gluten Free pie crust. Their pizza dough and pie crusts are the only products that produce delicious, flaky, and buttery pastry dishes. We use them for our chicken pot pie and hand our homemade hand pies.
For the brown sugar filling:
– 1 cup packed light or dark brown sugar
– 2 teaspoons ground cinnamon
– 2 tablespoons gluten-free flour
– A pinch of salt
For the glaze:
– 1 cup powdered sugar
– 2 tablespoons dairy-free milk* (or regular milk if not dairy-sensitive)
– 1/2 teaspoon vanilla extract
HOW TO MAKE GLUTEN-FREE POP-TARTS
1. Make the Brown Sugar Filling
In a separate bowl, combine the brown sugar, ground cinnamon, gluten-free, and a pinch of salt. Mix until all the ingredients are well incorporated. Set the filling aside while you roll out the dough.

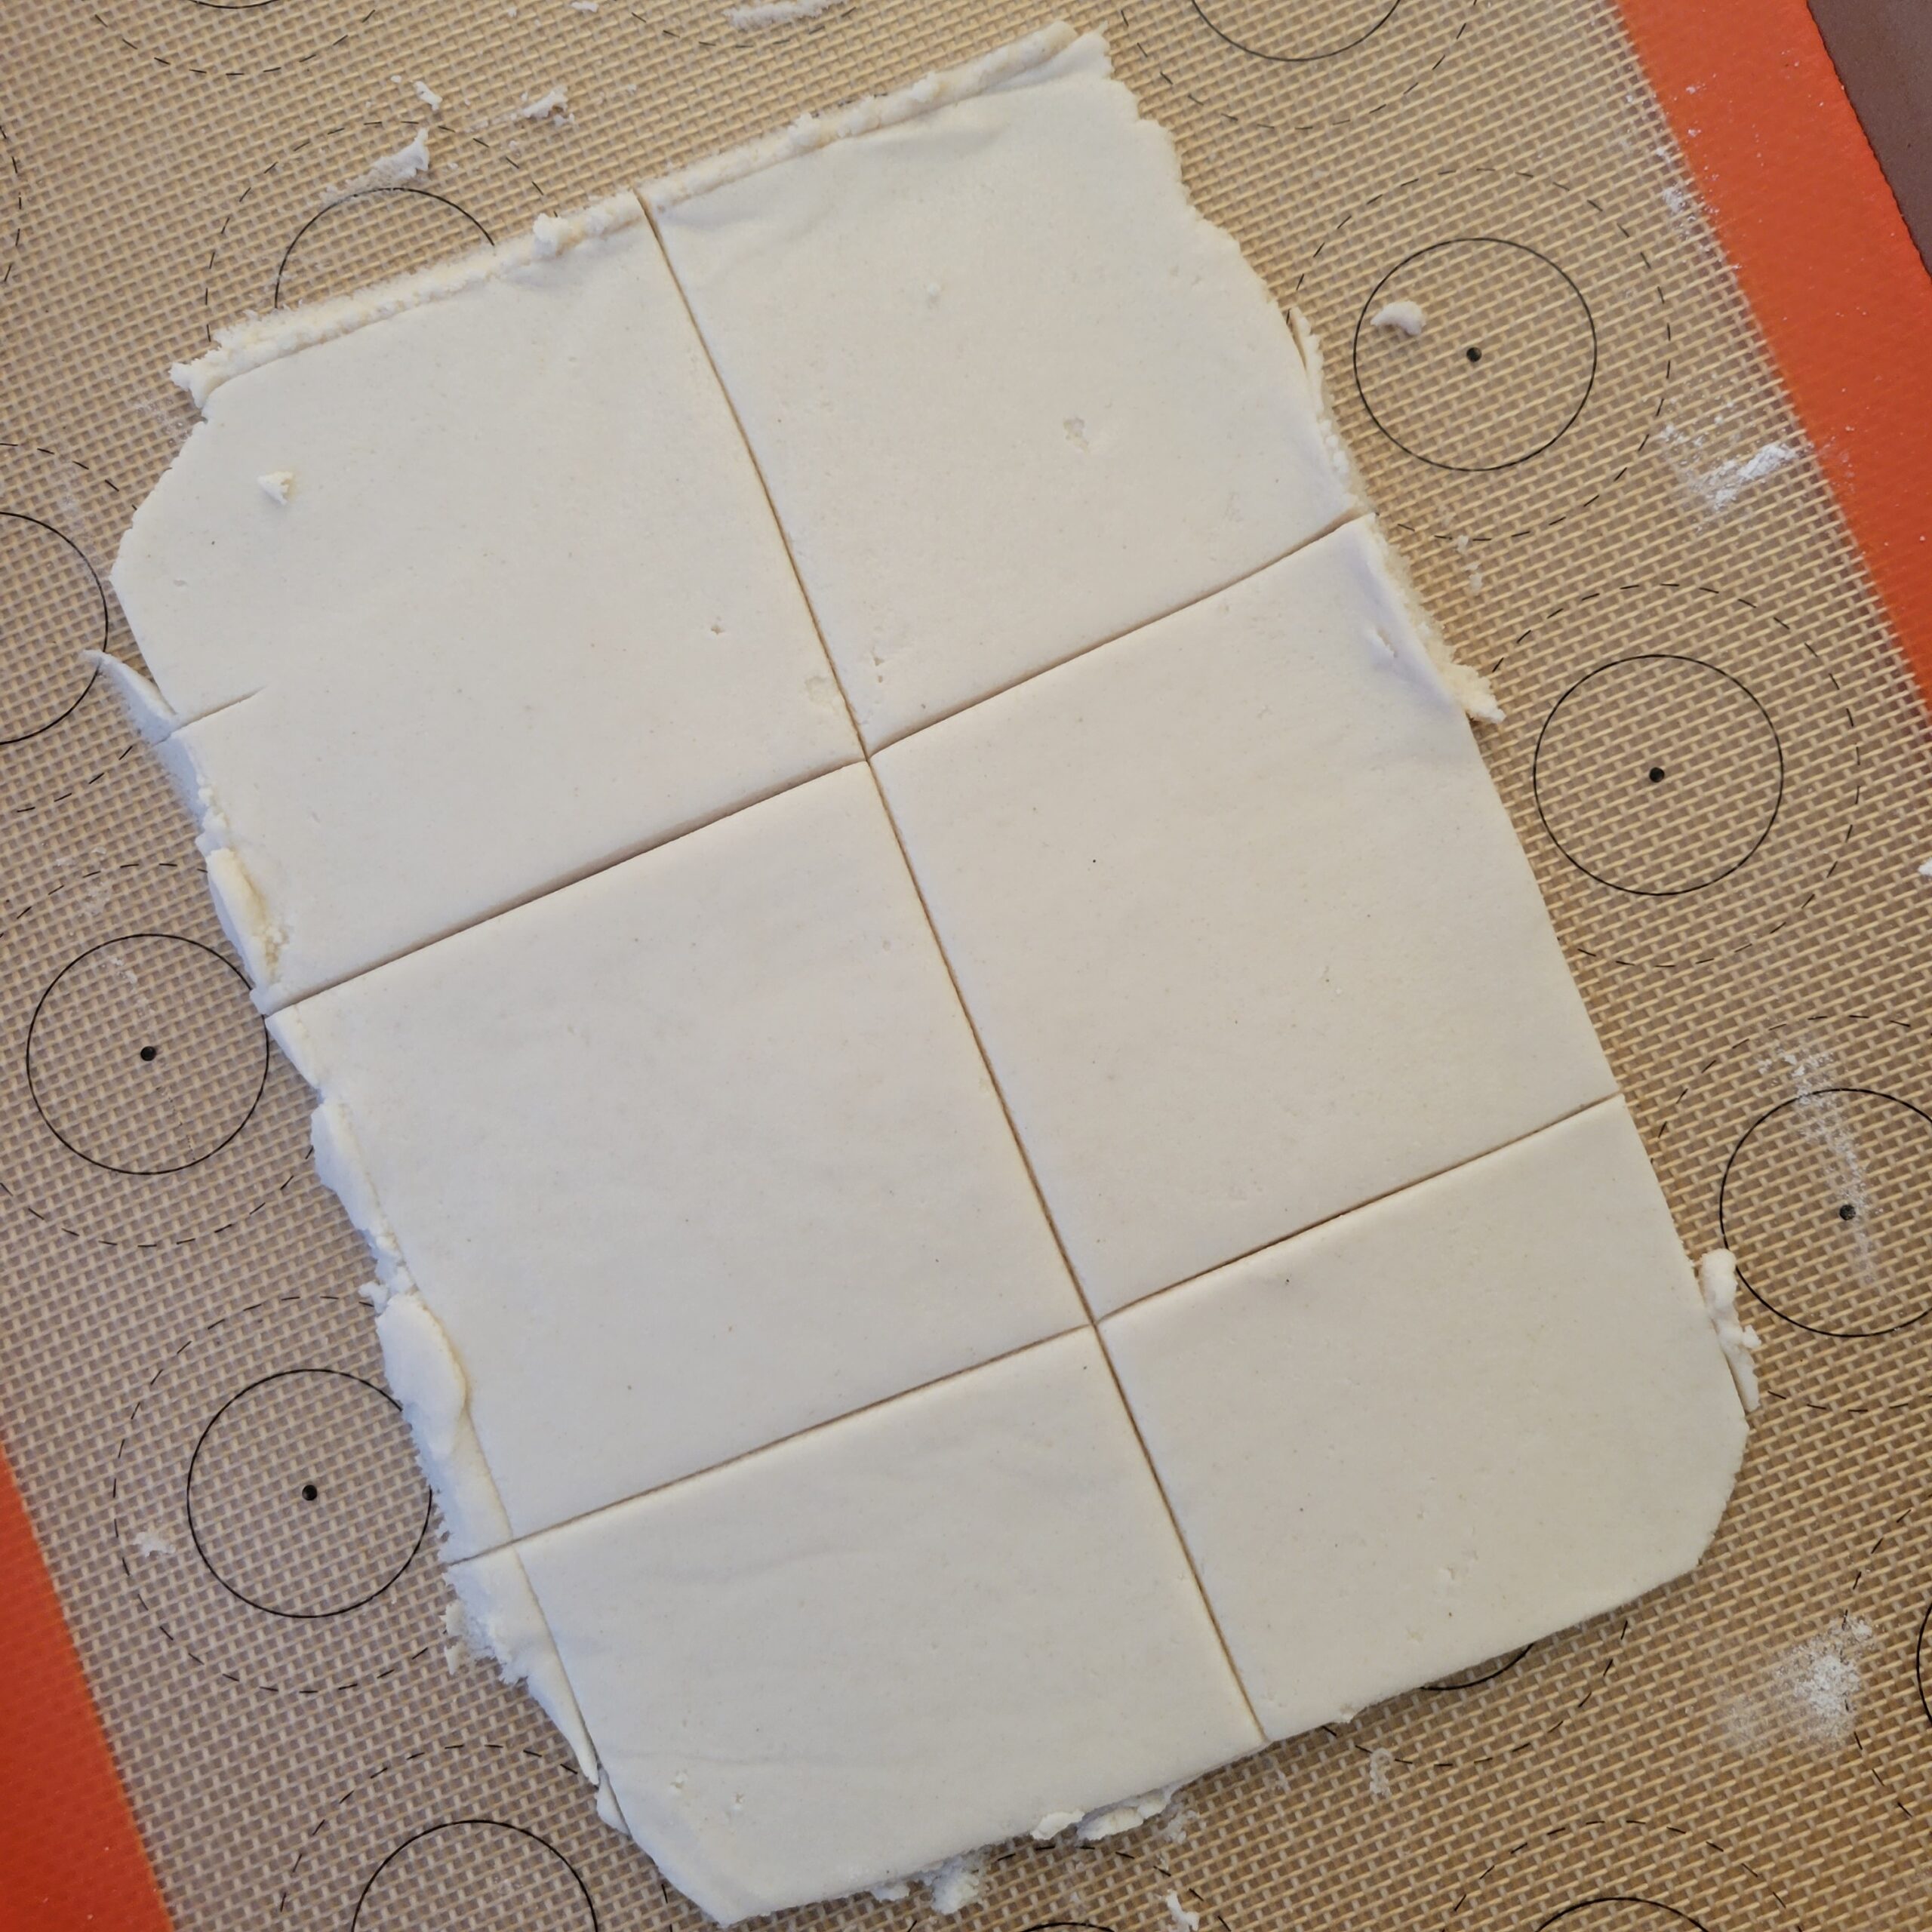
2. Roll Out the Dough and Assemble the Pop-Tarts
Preheat your oven to 375°F (190°C) and line a baking sheet with parchment paper. Take one disc of chilled dough and roll it out on a floured surface to about 1/8 inch thickness. Cut the dough into rectangles, approximately 3×4 inches each. Repeat this step with the other disc of dough.
3. Fill and Seal the Pop-Tarts
Place about 1-2 tablespoons of the brown sugar filling onto the center of half of the rectangles you’ve cut out. Leave a small border around the edges to seal the Pop-Tarts. Carefully place the remaining rectangles over the filling and use an oiled or fork dipped in melted plant-based butter to press the edges together firmly, creating a seal. Poke a few holes in the top of each Pop-Tart to allow steam to escape while baking.

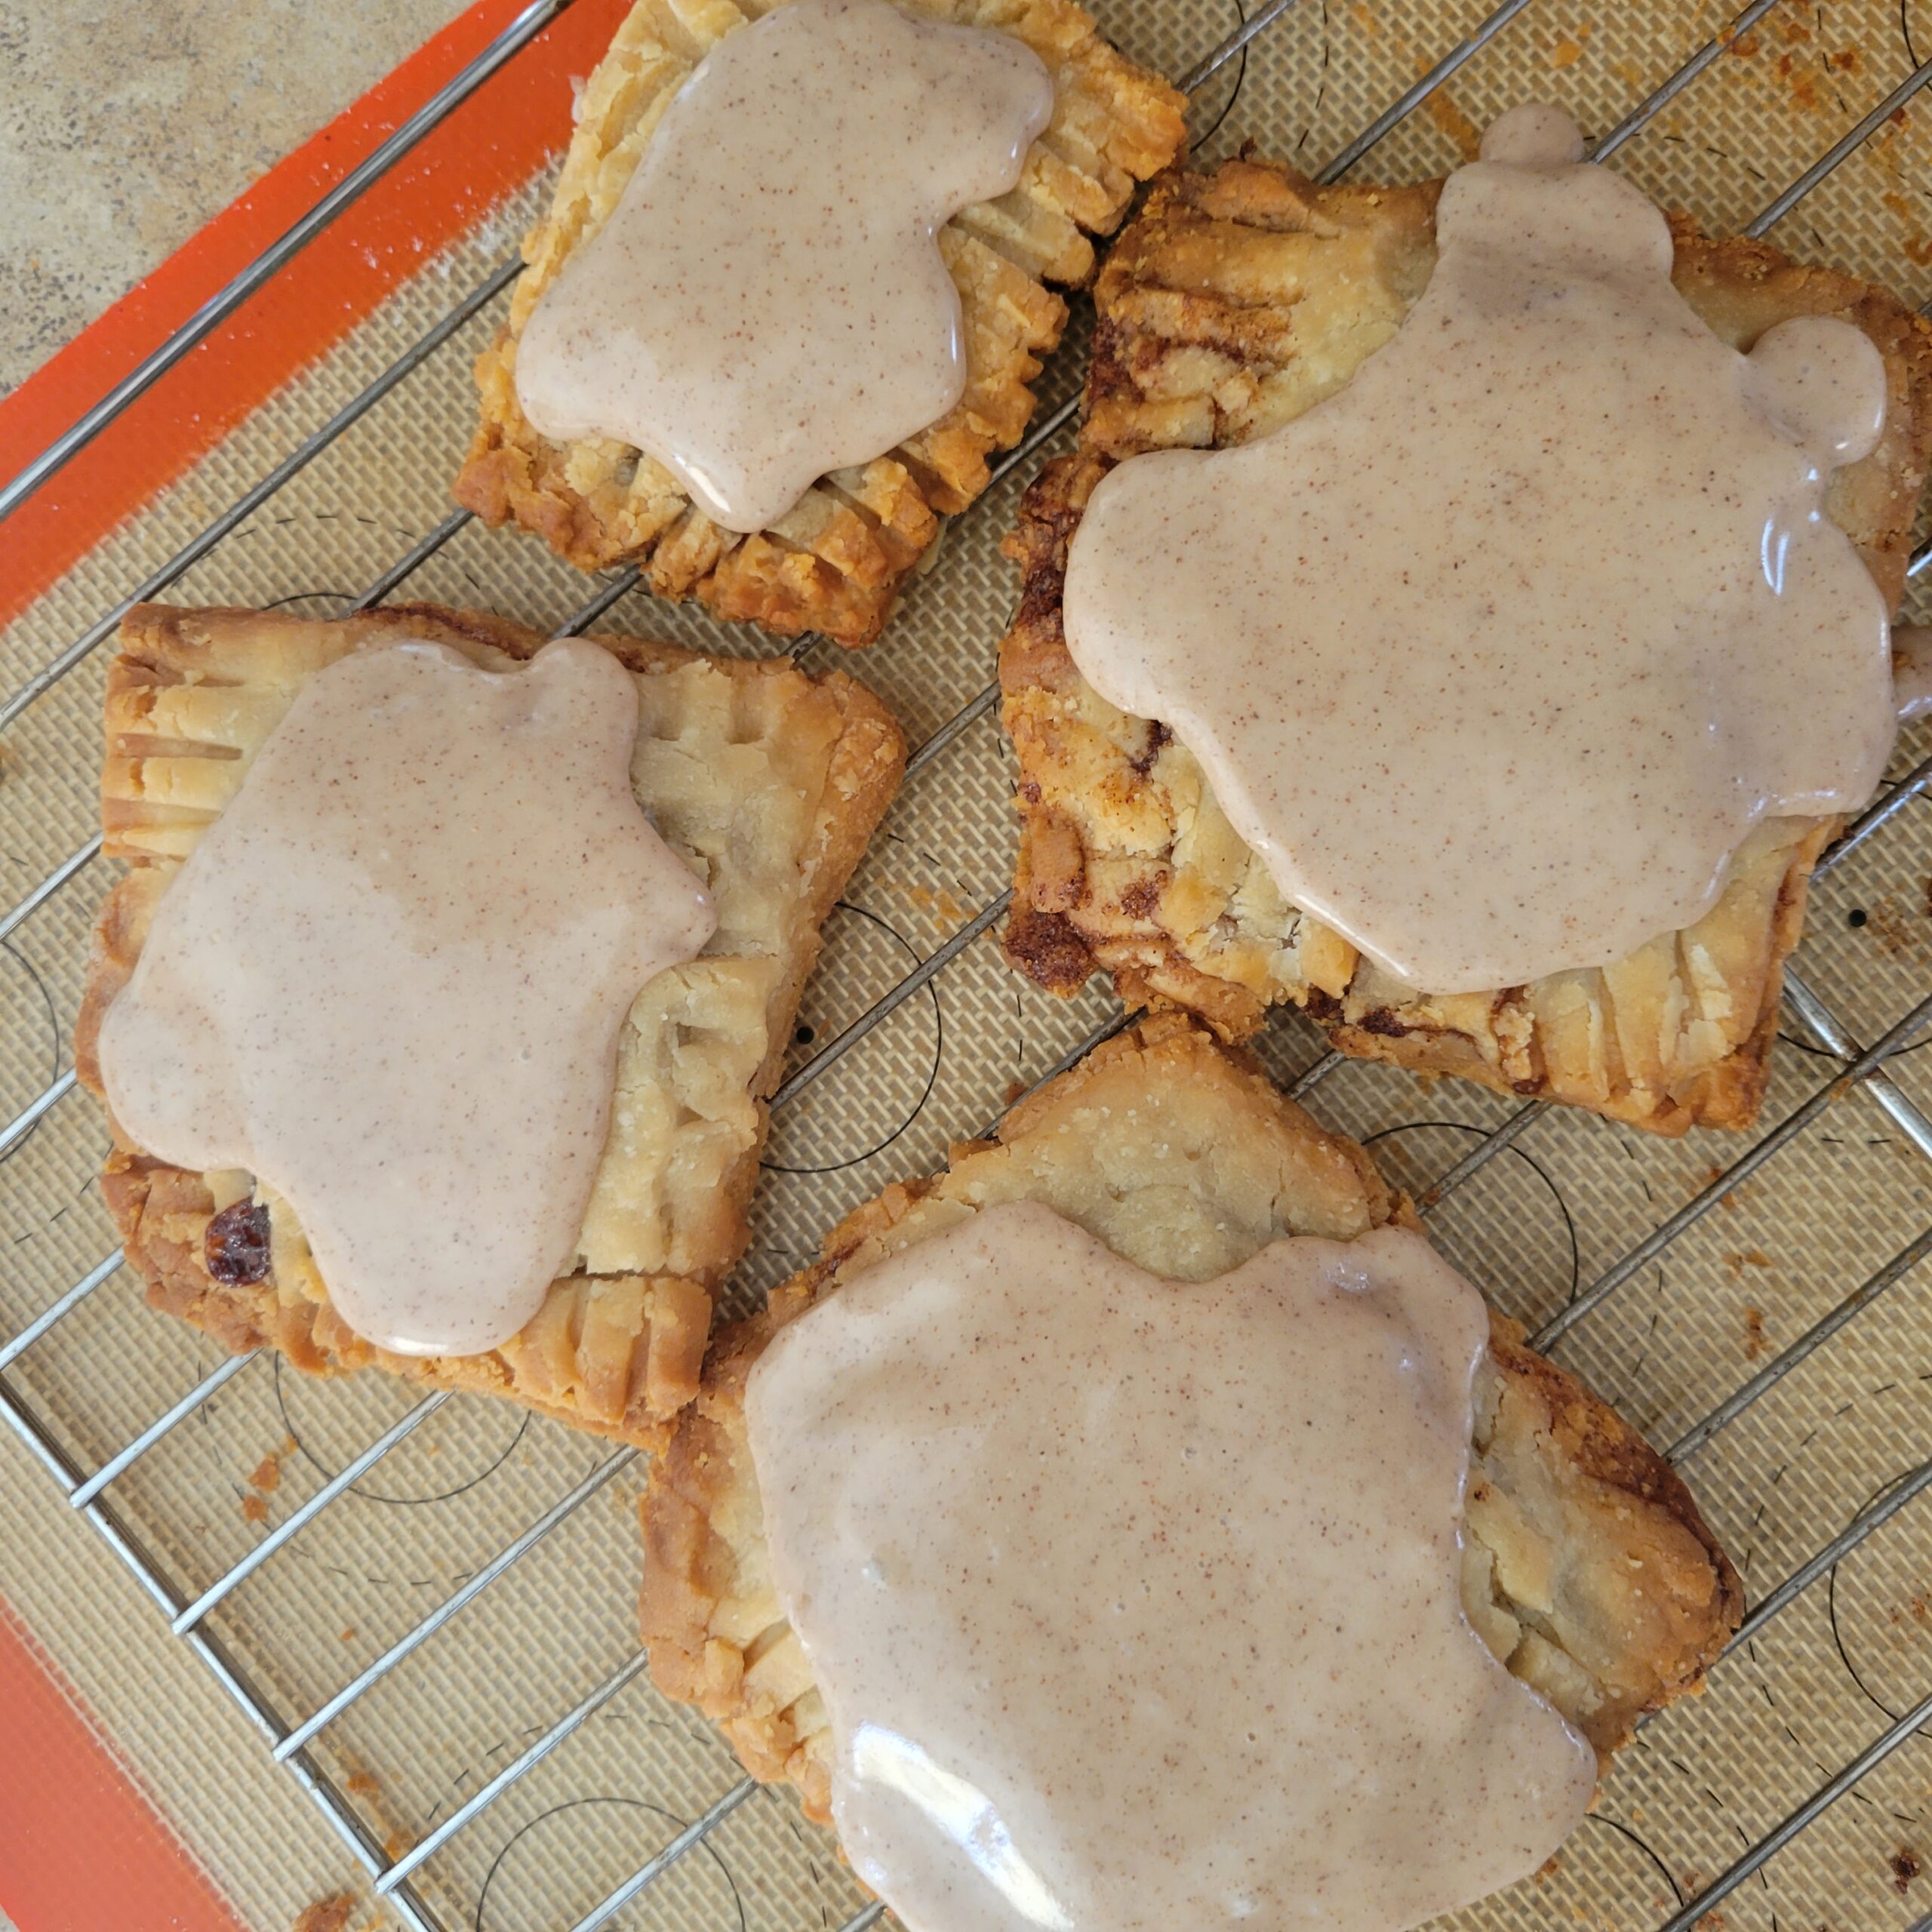
4. Bake to Perfection
Transfer the assembled Pop-Tarts onto the prepared baking sheet and bake in the preheated oven for 15-18 minutes, or until they turn golden brown. Remove from the oven and allow them to cool on the baking sheet for a few minutes before transferring them to a wire rack to cool completely.

5. Prepare the Glaze
In a small bowl, whisk together the powdered sugar, dairy-free milk (or regular milk), and vanilla extract until you get a smooth, thick glaze.

6. Add the Finishing Touch
Once the Pop-Tarts are completely cooled, drizzle the glaze over the top of each pastry using a spoon or a piping bag. Allow the glaze to set for a few minutes before serving.
Commonly Asked Questions:
1. Can I use a different type of flour?
Absolutely! If you’re not gluten-sensitive, you can use regular all-purpose flour instead of gluten-free flour. However, keep in mind that the texture and taste may vary slightly.
2. Can I use a different filling?
Of course! While the brown sugar cinnamon filling is classic and delicious, you can get creative and use fruit preserves, chocolate spread, or other allergy-friendly fillings of your choice.
3. How should I store the Pop-Tarts?
Store the Pop-Tarts in an airtight container at room temperature for up to 3 days. If you want to keep them longer, you can freeze them for up to 2 months. Just make sure to wrap them individually in plastic wrap and place them in a freezer-safe container.
Homemade allergy-friendly brown sugar Pop-Tarts are the perfect treat for those with dietary restrictions or food allergies. By using simple substitutions and allergen-free ingredients, you can enjoy this classic pastry without worry. Plus, the satisfaction of making them from scratch adds an extra layer of joy to the experience. So, gather your ingredients, follow the steps, and embark on a delightful baking adventure that everyone can enjoy! Your family and friends will be thrilled with these delicious, allergy-friendly Pop-Tarts, and you’ll likely find yourself making them over and over again!
I hope you enjoyed this recipe. Connect with me on social @blackallergymama and subscribe to my newsletter to receive recipes directly to your inbox!

Scratch Gluten-Free Brown Sugar Pop-Tarts
Ingredients
Pastry Dough
- 1 pack Wholly Gluten Free Pie Crust (2) pack
Brown Sugar Filling
- 1 Cup Brown Sugar
- 1 tsp Cinnamon
- 2 tbs Gluten-Free Flour
- Pinch Salt
Pop-Tart Glaze
- 1 Cup Powdered Sugar
- 2 tbs Dairy-Free Milk
- 1/2 tsp Vanilla Extract
Instructions
Make the Brown Sugar Filling
- In a separate bowl, combine the brown sugar, ground cinnamon, gluten-free, and a pinch of salt. Mix until all the ingredients are well incorporated. Set the filling aside while you roll out the dough.
Roll Out the Dough and Assemble the Pop-Tarts
- Preheat your oven to 375°F (190°C) and line a baking sheet with parchment paper. Take one disc of chilled dough and roll it out on a floured surface to about 1/8 inch thickness. Cut the dough into rectangles, approximately 3×4 inches each. Repeat this step with the other disc of dough.
Fill and Seal the Pop-Tarts
- Place about 1-2 tablespoons of the brown sugar filling onto the center of half of the rectangles you’ve cut out. Leave a small border around the edges to seal the Pop-Tarts. Carefully place the remaining rectangles over the filling and use an oiled or fork dipped in melted plant-based butter to press the edges together firmly, creating a seal. Poke a few holes in the top of each Pop-Tart to allow steam to escape while baking.
Bake to Perfection
- Transfer the assembled Pop-Tarts onto the prepared baking sheet and bake in the preheated oven for 15-18 minutes, or until they turn golden brown. Remove from the oven and allow them to cool on the baking sheet for a few minutes before transferring them to a wire rack to cool completely.
Prepare the Glaze
- In a small bowl, whisk together the powdered sugar, dairy-free milk (or regular milk), and vanilla extract until you get a smooth, thick glaze.
Add the Finishing Touch
- Once the Pop-Tarts are completely cooled, drizzle the glaze over the top of each pastry, using a spoon or a piping bag. Allow the glaze to set for a few minutes before serving.


These are so good! My kids didn’t know they were gluten free!