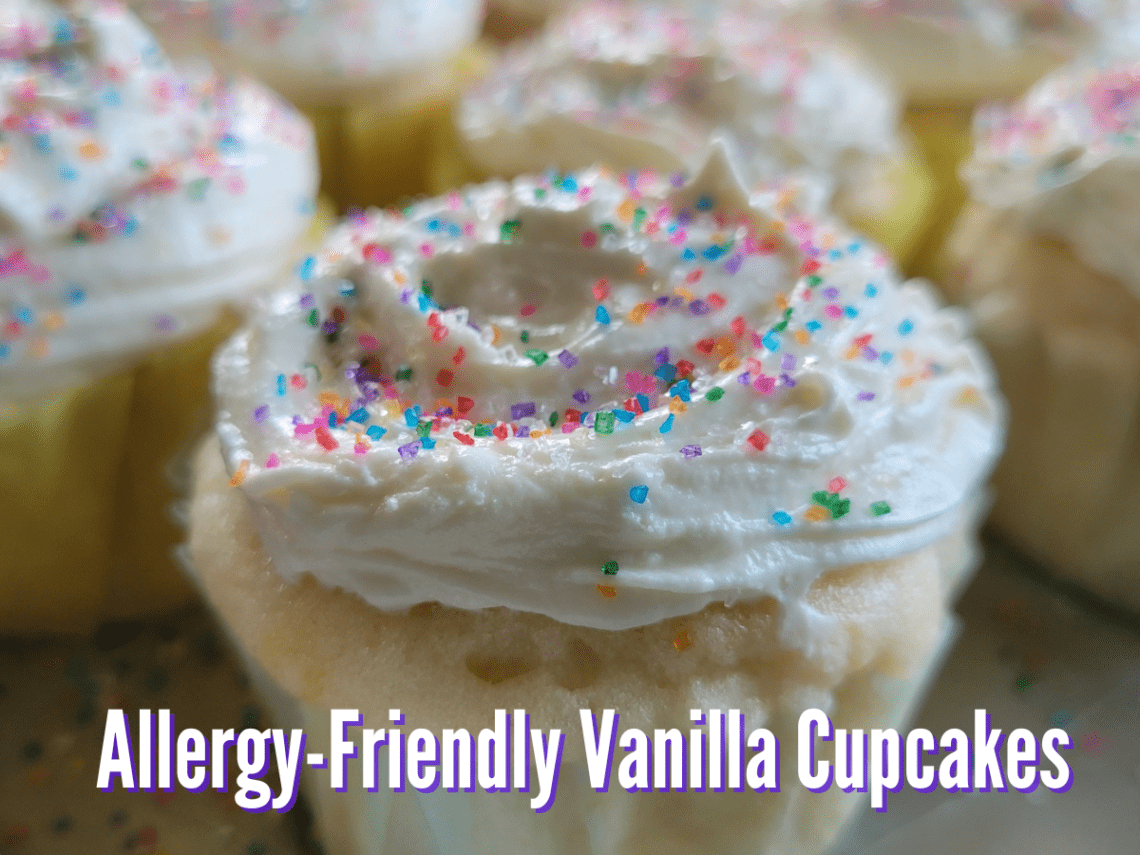
If you are looking for a mouthwatering recipe for allergy-friendly vanilla cupcakes that will leave your taste buds dancing with joy, look no further! Whether you or a loved one have food allergies or appreciate a delectable dessert, these cupcakes are here to satisfy your cravings without compromising on flavor or dietary needs. So, put on your baking apron, gather your ingredients, and let’s get started!
Recipe for Allergy-Friendly Vanilla Cupcakes:
Before we dive into the details, let me introduce you to the fabulous recipe we’ll be using today. This wonderful creation comes from the talented Nagi at RecipeTin Eats, and it has been adapted to suit various food allergies and sensitivities. Get ready for a cupcake experience that will make you forget all your troubles!
This recipe calls for both eggs and milk. Due to Emory’s egg allergy, we use egg substitutes for our baking recipes. Our current favorite is the Ener-G Egg replacer, but any of the other options found here 12 Best DIY Egg Substitutes, will work just fine. Additionally, your favorite non-dairy option, like almond or soy milk, will work. Emory prefers my homemade rice milk.
Ingredients:
- 1 ½ cups gluten-free flour blend (make sure it’s labeled gluten-free)
- 1 ½ tsp baking powder (gluten-free)
- ¼ tsp salt
- ½ cup unsalted dairy-free butter softened
- 1 cup granulated sugar
- 2 tbs of Ener-G Egg replacer + 6 tbsp warm water
- 2 tsp vanilla extract (check for allergen-free options)
- 1 cup unsweetened rice milk (or your favorite dairy-free alternative almond, or soy work well)
Instructions:
- Preheat your oven to 180°C (350°F) and line a cupcake tray with paper liners.
- In a medium-sized bowl, whisk together the gluten-free flour blend, baking powder, and salt until well combined. Set aside.
- In a separate large mixing bowl, cream the dairy-free butter and sugar together until light and fluffy.
- Add the eggs, one at a time, beating well after each addition. Stir in the vanilla extract.
- Gradually add the dry flour mixture to the wet ingredients, alternating with the dairy-free milk. Begin and end with the dry ingredients, mixing well after each addition.
- Divide the batter evenly among the cupcake liners, filling each about two-thirds full.
- Bake in the preheated oven for approximately 20-25 minutes or until a toothpick inserted into the center of a cupcake comes out clean.
- Once baked, remove the cupcakes from the oven and let them cool in the tray for 5 minutes. Then transfer them to a wire rack to cool completely.

Commonly Asked Questions About Baking with Gluten-Free Flour:
- Can I substitute regular flour for gluten-free flour in this recipe?
Absolutely! While this recipe uses gluten-free flour, you can substitute it with an equal amount of regular all-purpose flour if you don’t have any dietary restrictions. The texture and taste may differ slightly, but it will still be delicious.
- How do I ensure my cupcakes don’t turn out dry when using gluten-free flour?
Gluten-free flours can sometimes result in drier baked goods. To keep your cupcakes moist, make sure not to overbake them. Check for doneness by inserting a toothpick into the center of a cupcake – if it comes out clean or with a few crumbs, they’re ready to be taken out of the oven.
- Are there any specific adjustments I need to make when using gluten-free flour?
Gluten-free flours often benefit from additional binding agents and moisture. In this recipe, the dairy-free butter, egg replacer, and rice milk provide moisture and structure. If you’re experimenting with different gluten-free flour blends, you may need to adjust the quantities of these ingredients accordingly.

Conclusion:
Now that you have the recipe for these delightful allergy-friendly vanilla cupcakes and some handy tips for baking with gluten-free flour, it’s time to let your inner baker shine. Whether you have dietary restrictions or want to indulge in a scrumptious treat, these cupcakes are sure to please everyone’s palates.
Remember, embracing allergies doesn’t mean sacrificing taste or enjoyment. It’s all about finding creative and delicious alternatives that cater to your specific needs. So, whip out your mixing bowls, don your chef’s hat, and create a batch of these allergy-friendly vanilla cupcakes to brighten up your day!
Happy baking, and enjoy every delectable bite!
Source: Recipe adapted from: https://www.recipetineats.com/my-very-best-vanilla-cake/
Allergy-Friendly Vanilla Cupcakes
Ingredients
- 1½ cups Gluten-Free Flour
- 1½ tsp Baking Powder
- ¼ tsp Salt
- 1/2 cup unsalted, dairy-free butter Softened
- 1 cup Granulated Sugar
- 2 tbs Ener-G Egg Replacer + 6 tbsp warm water
- 2 tsp Vanilla Extract
- 1 cup Rice milk or Dairy-Free option
Instructions
- Preheat your oven to 180°C (350°F) and line a cupcake tray with paper liners. Spray liners with olive oil.
Prepare Egg replacer
- Add 6 tbsp of warm water into small ramakin. Slowly whisk in 2 tbsp of the egg replacer powder, ensuring all lumps have dissolved and the mixture becomes frothy. Set aside.
- In a medium-sized bowl, whisk together the gluten-free flour blend, baking powder, and salt until well combined. Set aside.
- In a separate large mixing bowl, cream the dairy-free butter and sugar together until light and fluffy.
- Add the egg replacer, one tbsp at a time, beating well after each addition. Stir in the vanilla extract.
- Gradually add the dry flour mixture to the wet ingredients, alternating with the dairy-free milk. Begin and end with the dry ingredients, mixing well after each addition.
- Divide the batter evenly among the cupcake liners, filling each to the top of the baking cup.
- Bake in the preheated oven for approximately 20-25 minutes or until a toothpick inserted into the center of a cupcake comes out clean.
- Once baked, remove the cupcakes from the oven and let them cool in the tray for 5 minutes. Then transfer them to a wire rack to cool completely.
Notes
- Filling the baking cups: I prefer to use a measuring cup (1/4) to fill the liners.
- This recipe yields 12 cupcakes. If you plan to eat only some of them right away, you can easily freeze these cupcakes. Wrap each cupcake in saran wrap and place them into a large ziplock bag. Press the bag, remove all the air, and place it in the freezer. They will keep for up to 1 month. They never last that long in our home.


i love the way you care for people with allergys and i feel like kind people like you will change the world for young kids like us