
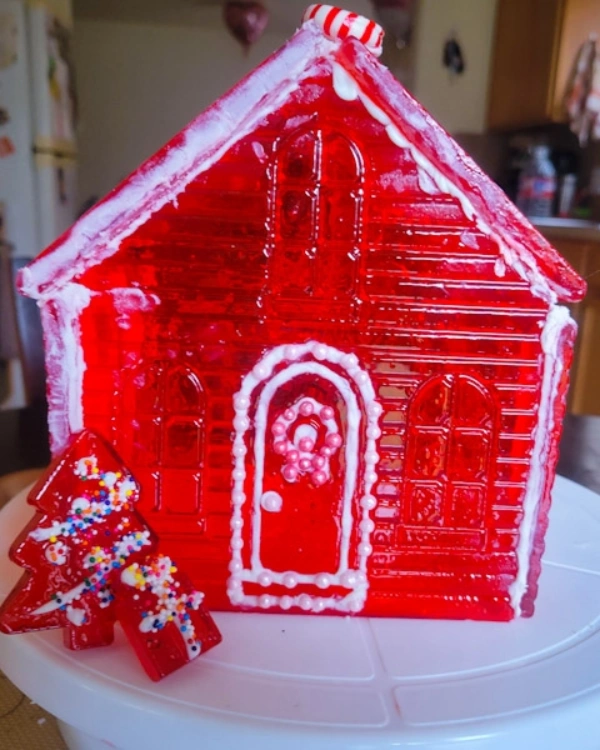
Emory and I decided to make a Glass Candy House this holiday season as an alternative to our traditional AF* cakes, cookies and pies. It turned out to be a fun project for Emory and totally gives perfect the typical gingerbread house a run for its money (IMO). This hard candy house will surely be a family tradition for years to come! Read on for the hard candy recipe.
* Allergy-friendly
(Read the recipe card for the full recipe!)
I’m all about traditions. Especially when those traditions create fun memories for my girls. Before having Emory, all of my holiday “traditions ” involved food, and honestly, I’m still working to navigate around that. Whenever I have the opportunity to merge both worlds (allergy-safe foods + traditions), I take it! I enjoy creating in the kitchen with my child and I think she enjoys that time with me as well.
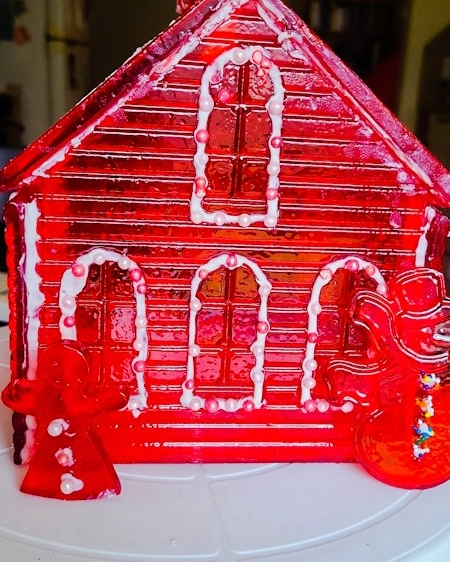
Our Glass Candy House is the perfect alternative to the traditional gingerbread house. It’s delicious, fun to decorate (and smash), and a beautiful accompaniment to any holiday table.
Unlike the standard gingerbread house, our glass candy house can be any flavor and color your heart desires. We chose to make our cherry-flavored hard candy house red, but I implore you to lean into your creative side with this recipe!!
The BEST part about these glass candy houses (similar to gingerbread houses) is the smashing and eating of the candy. We put fun things on the inside to add a bit of additional excitement to the smashing. Click HERE To watch Emory and I smash our hard candy house.
HOW TO MAKE HARD CANDY FOR THE WALLS OF YOUR GLASS CANDY HOUSE
Our houses are made of hard candy. For the candy recipe, you will need only three ingredients: corn syrup, sugar, and water. Simply bring these ingredients to hard crack (350° using your trusty candy thermometer).
THE BEST MOLDS FOR HARD CANDY HOUSES
Silicone molds are the best and safest way to make these glass candy houses. It’s important that the cooled candy doesn’t stick to the mold. Silicone allows your candy to pop out of the mold easily. Find the molds I use here. If you’re looking for a smaller version I use this one!
HOW DO YOU FLAVOR AND COLOR THE HARD CANDY?
Obviously, you can color the candy with your favorite food coloring. We use the natural food coloring found here.
Adding flavor to your hard candy is super simple using these drams of concentrated flavoring oil (equivalent to 1 tsp). Cinnamon is my go-to but we decided on cherry oil for Emory.
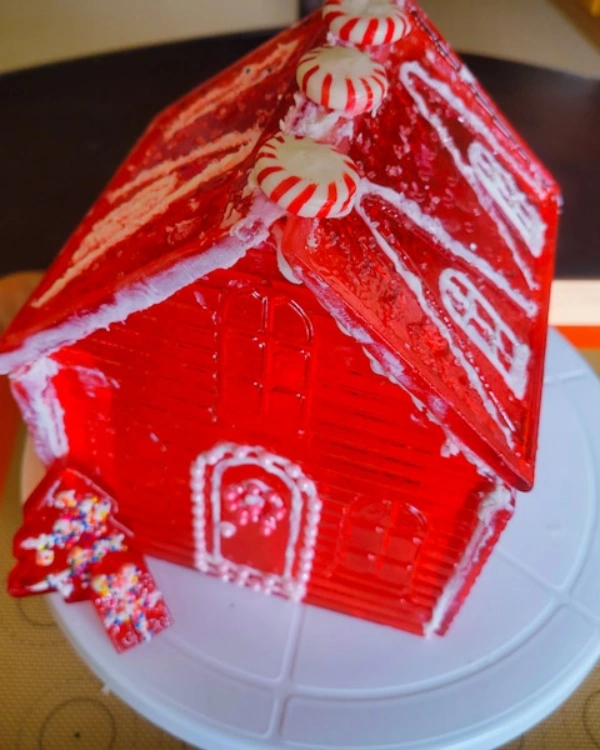
HOW TO ASSEMBLE YOUR GLASS CANDY HOUSE
As with the traditional gingerbread house, I used icing. You can make your own icing, or check out this easy recipe from Allergy Awesomeness. Because the icing isn’t the focal point of this house, you could also use this store-bought option from Duncan Hines (like we do!) Using a piping bag, pipe a thick line of white icing along the edges of the walls and roof. Stick each wall one at a time and allow each wall to sit for a few minutes before sticking on the next pieces. This will ensure nothing falls or breaks while working on other portions of the house.
For a cleaner look, you can use heat to assist with assembly. If children are involved in the assembly an adult will need to take the lead on this part as it involves fire. Using a lighter, gently heat the sides of the walls (roof) until the candy because shiny and sticky. Using the melting candy as glue, place the ends of the walls together and allow them to sit for a few minutes.
NOTES:
- Dust smashed hard candy with powdered sugar to keep small pieces from sticking together.
- Store smashed candy pieces in ziplocked bag or metal, wax paper lined tin.
- Candy lasts for up to two months.
Glass Candy House
Equipment
- Candy Thermometer
- Large pot
Ingredients
- 3¾ cups White Sugar
- 1 cup Water
- 1½ cupcups Corn Syrup
Instructions
- Prep: Place silicone molds on a baking sheet lined with silicone sheets (my suggestion)
- Mix all ingredients in a large pot and bring to a boil
- Heat the sugar mixture to 350° (or until the candy thermometer reads "hard crack")
- Remove candy from heat and add 1 dram of selected oil and 2 drops of food coloring (or more until your candy reaches your preferred color)
- Pour candy into molds and allow to sit for at least 24 hours
- Pop hardened andy slowly from molds and assemble your house.


I made one of these so my daughter could decorate at school with her peers. Thanks for sharing! Yours came out really great.